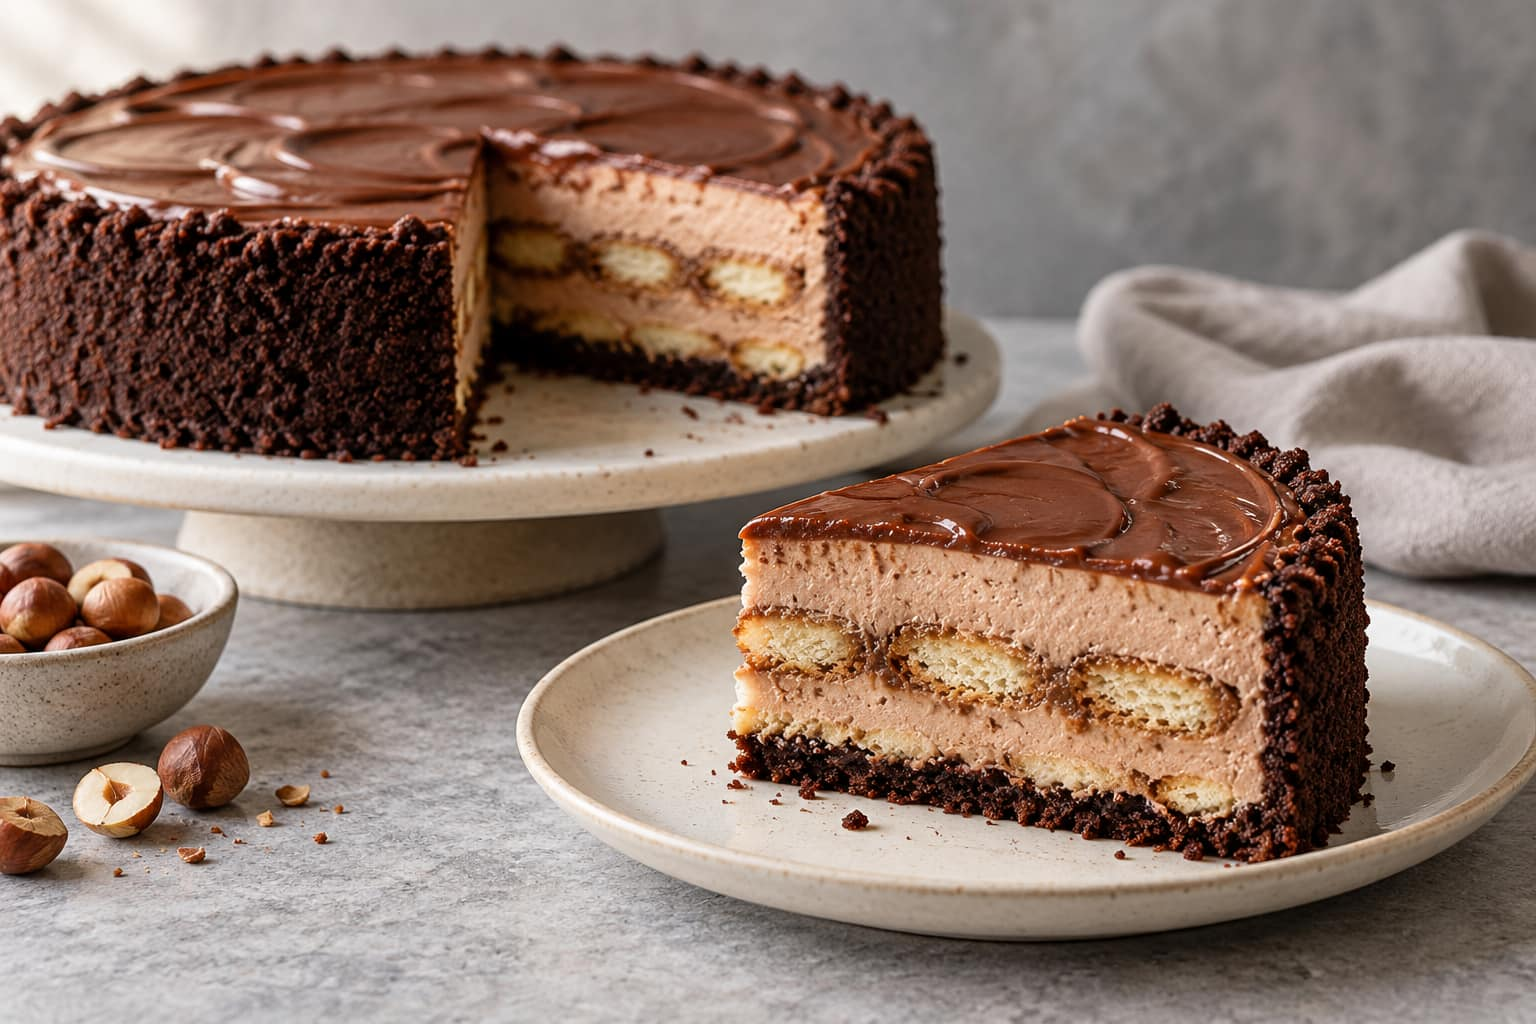
A crisp chocolate-cookie shell, a soft hazelnut cream filling, and two layers of milk-dipped ladyfingers make this chilled cake a dessert worth planning ahead for. A glossy layer of Nutella finishes the top, so each slice has a little crunch, plenty of cream, and a rich chocolate-hazelnut flavor.
This is a tiramisu-inspired cake with a cheesecake-style crust. The biscuits are dipped in chocolate milk instead of coffee, and the filling sets in the refrigerator without gelatin. Assemble it the day before you need it, then add the topping before serving.
Recipe at a glance
- Yield: 8 generous slices
- Pan: 20 cm / 8-inch springform pan with a deep side
- Preparation: about 50 minutes
- Chilling: at least 8 hours, preferably overnight
- Total: about 8 hours 50 minutes, plus finishing
- Equipment: food processor or rolling pin, mixer, bowls, spatula, and a small saucepan
Ingredients
Weigh the ingredients for consistency. You will need 630 g of Nutella in total, divided between the filling, dipping milk, inner layers, and topping.
Chocolate cookie crust
- 300 g chocolate sandwich cookies, such as Oreos, with their cream centers
- 35 g unsalted butter, melted
Hazelnut cream filling
- 220 ml cold heavy whipping cream, about 35% fat
- 30 g powdered sugar
- 450 g mascarpone
- 50 g full-fat cream cheese
- 275 g Nutella or a similar chocolate-hazelnut spread
- 1/4 teaspoon fine salt
Dipping milk and layers
- 200 ml milk
- 90 g Nutella for the dipping milk
- About 16 crisp ladyfingers, trimmed as needed to make two layers
- 115 g Nutella for spreading between the layers
Topping
- 150 g Nutella
How to make the cake
- Build the crust. Line the bottom of the springform pan with baking paper. Crush the whole cookies into fine crumbs, then stir in the melted butter. Press the mixture firmly across the base and partway up the sides, using the flat bottom of a glass to compact it. Refrigerate while you prepare the filling.

- Make the dipping milk. Warm the milk in a small saucepan until steaming. Remove from the heat and whisk in 90 g Nutella until the mixture is smooth. Pour into a shallow bowl and let it cool to room temperature before dipping any biscuits.
- Prepare the cream. Whip the cold heavy cream with the powdered sugar until soft peaks form: when you lift the beaters, the tip should bend over. In a separate bowl, gently stir the mascarpone, cream cheese, and salt until smooth, then mix in 275 g Nutella. The cheeses should be soft enough to stir, but still cool. Fold the whipped cream into this mixture in two additions, stopping as soon as the color is even.
- Add the first layers. Briefly dip enough ladyfingers to cover the base, turning each one to moisten both sides. Arrange them over the crust, cutting pieces to fill larger gaps. Spread half of the 115 g Nutella over the biscuits, then cover with half of the cream filling.
- Repeat and chill. Add a second layer of briefly dipped ladyfingers, the remaining Nutella for the layers, and the rest of the filling. Smooth the surface, cover without touching the cream, and refrigerate for at least 8 hours or overnight.

- Finish the top. Gently warm the 150 g Nutella just until it flows easily. Let it cool until barely warm, then spread a thin, even layer over the cold cake. Keep the cake in its pan and return it to the refrigerator until the topping is no longer runny.

- Unmold and slice. Carefully loosen the edge before opening the springform ring. Cut with a sharp knife, wiping the blade between slices. Serve the cake cold and return any remaining portions to the refrigerator promptly.
Small details that help the cake hold its shape
- Keep the biscuit dip brief. The ladyfingers continue absorbing moisture as the cake rests. A long soak can leave the layers waterlogged.
- Handle mascarpone gently. Stir only enough to remove lumps and combine the ingredients. Extended beating can make the filling grainy.
- Let the refrigerator do its work. This filling has no gelatin, so a short chill will not give it the same support as an overnight rest.
- Check the crust texture. Squeeze a little crumb mixture in your hand. If it falls apart immediately, mix in a small extra spoonful of melted butter before pressing it into the pan. Cookie brands vary.
Make ahead and storage
Make the cake one day ahead and keep it covered in the refrigerator at 4°C / 40°F or colder. Aim to enjoy it within 3 days of assembly, and follow any shorter storage instructions on your dairy products.
For longer storage, freeze individual slices until firm, then wrap and place in a freezer-safe container. Use within 1–2 months for best texture and thaw overnight in the refrigerator. The cream may be slightly softer after thawing.
Keep serving time brief. Under USDA food-safety guidance, discard perishable food left out for more than 2 hours, or 1 hour when the temperature is above 32°C / 90°F.
Questions before you start
Is this an egg-free dessert?
No raw eggs are added to the filling, but conventional ladyfingers usually contain eggs. Check every packaged ingredient and choose suitable alternatives if you need an egg-free version.
Can I use another chocolate spread?
A similar chocolate-hazelnut spread can work, although sweetness and firmness vary by brand. A runny sauce is not a direct substitute for a thick spread.
Why is there no coffee?
Chocolate-hazelnut milk gives the biscuit layers their moisture in this version. The result borrows the layered style of tiramisu while keeping the focus on chocolate and hazelnut.
Allergen note: This recipe contains milk, hazelnuts, and wheat, and typically eggs and soy depending on the brands used. Always check labels.
More no-bake desserts to try
Liked skipping the oven? This cake is one of the chilled, set-overnight desserts we love most. If you are after a baked treat instead, our Bakery-Style Double Chocolate Chip Cookies come out thick and chewy every time.

For more desserts like this one, grab our Easy No-Bake Sweets Collection – 100 Recipes. It is a 103-page PDF cookbook with 100 easy sweets, each with a serving-suggestion image, an ingredient list, and step-by-step instructions. Most need no oven at all, and a few use just a microwave or saucepan.
Browse all of our dessert recipes, or visit the Perfect Cooking shop for our other recipe collections.
Leave a Reply